6-04-06 - Diesel Conversion
-
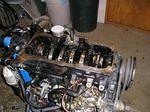
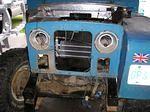
The 2.5 Turbo Diesel, known as the XD3T from a mid-eighties Peugeot 505. This particular one is from a 1986, which is quite rare in Canada.
-
Old engine removed, firewall stripped and a layer of sound deadening material applied.
-
It looks kind of golden. This is because the entire surface has been coated with contact cement before the next layer is added.
-
Completed with 3 layers, about 3/16" now in place, and the brake and clutch pedal assemblies put back.
-
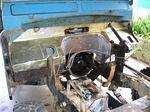
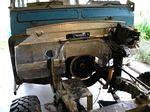
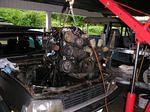
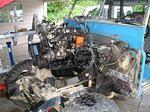
Looking at the 2.5 from above before undoing any connections in the car.
-

There were so many hoses and wires these photos will come in handy for reassembly.
-
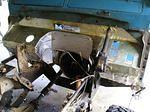
It took 9 hours of fiddling to disconect everything and remove the engine from the car. I didn't want to just cut everything in case I required it in the conversion.
-
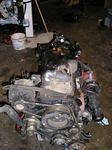
Out it comes.
-
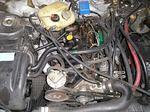
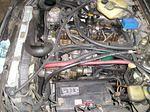
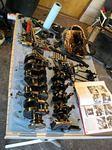
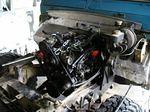
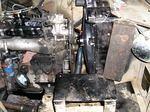
Still tons of belts, hoses and unneeded extras.
-
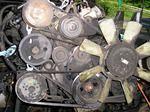
Lots of belts and pulleys, most of which will disappear. Note the angle which the engine sat at in the Peugeot.
-
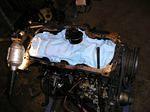
On an engine stand, drained and flipped upside down. Note angled oil pan to be removed.
-
Scraping the old gasket with the internals protected.
-
New oil pickup in place. Soon to be removed again...
-
Replacing the rear main seal... the rope seal refused to be extracted in place, so the crank had to come out. To get the crank out I had to remove the oil pickup again, the oil pump, the timing cover, the timing chain, the chain gears, the intermediate...
-
Reading the manual to ensure I get the chain back in the right spot.
-

Assembling the intermediate cover and the timing chain.
-
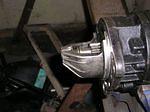
The new adapter plate installed.
-
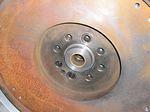
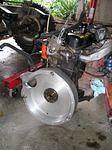
Test fitting the spigot insert and the redrilled Peugeot flywheel.
-
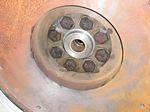
Everything now locktited and torqued into place.
-
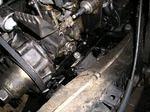
The Land Rover Series III clutch now installed. There is .3 mm clearance between the flywheel teeth and the new housing.
-
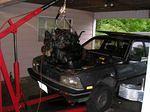
Preparing to lift it in.
-
First try installing the engine.
-
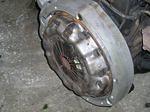
There was interference with the first try between the clutch master and the new housing.
-
A little additional grinding on hte new housing to accomodate the clutch slave cylinder.
-
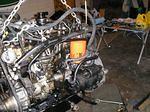
Second try, this time it fit, but I hadn't put the starter in yet.
-
Clearance of about .8 mm now between the slave cylinder and the housing.
-

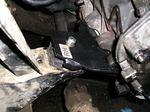
I had to trim the bracket on the left side of the frame. Also note the fan and fan clutch removed and the nut filed off.
-
Further clearancing on the starter and the bell housing required. The starter needed about 1 mm trimmed from the opening.
-
Engine out again and the bellhousing fitting lip also trimmed to ensure no interference between the starter and bellhousing.
-
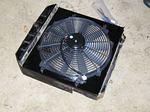
Electric fan and new sheet metal shroud test fitted.
-
Right hand motor mount in place.
-
Left hand motor mount in place.
-
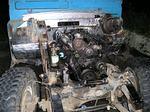
Finally, I'm not plannign on pulling it out again.
-
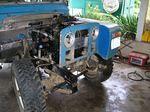
Test fitting the breakfast, radiator and left wing.
-
Note the new oil cooler.
-
The breafast propped into place. Note the tight clearance between the electric fan and the waterpump pulley nut. The battery box will be going soon too.
-
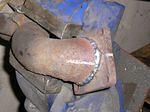
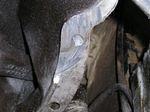
The turbo output pipe that come on the Peugeot interferes with just about everything, the firewall, the engine crossmember and the front driveshaft. One had to be fabricated. First I located a unit off a late 90s VW turbo diesel which exits directly do...
-
Second, this was cut and welded to the original pipe.
-
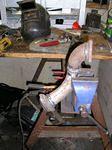
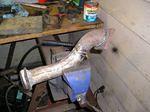
Third, the pipe was shorted. It now exits beside the driveshaft, above the crossmember.
-
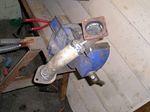
Another angle. All welds have been double welded. Some grinding will need to be done on the inside surface at the turbo inlet end, as I gave it a third weld, since this is likely the hotest point on the engine and I didn't want any chances of a leak.
-
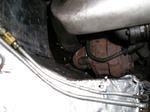
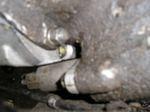
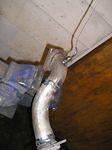
Looking down at the turbo outlet, showing its proximity to the firewall.
-

Looking from the inside at the pipe. Closest point to the firewall is about 3/4". I'll have to add a heat shield to it yet...
-
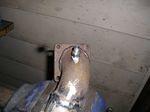
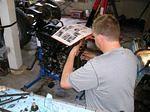
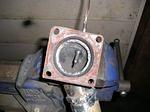
The fitting for the Pyro guage is drilled, threaded and installed.
-
The pyro test fitted in place.
-
The pyro probe from the inside. I still have to do some grinding...
Album info
Random image