

After my 2" lift, I had a bad pinion angle that chewed up Roto Flex's.
I also had a loud "clunk" when shifting into reverse.
Today I decided to fix the problem.
I raised the "A" arms 2 1/4" & moved the Fulcrum Ball Joint to the rear 2".
I also changed the Fulcrum Ball Joint with a new adjustable one.
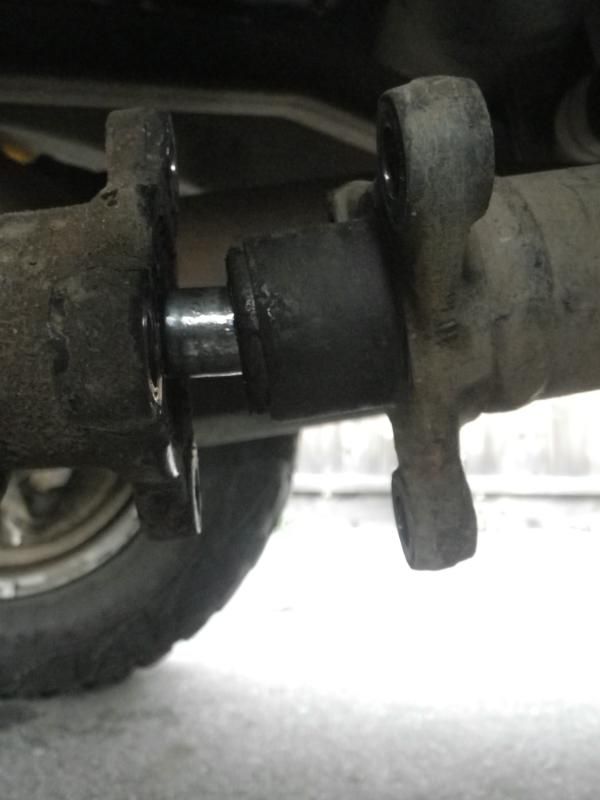
Before pinion angle
http://img.photobucket.com/albums/v493/ ... sco001.jpg
http://img.photobucket.com/albums/v493/ ... sco006.jpg
New pinion angle
http://img.photobucket.com/albums/v493/ ... era006.jpg
Heres how I did it.
Started with a 6"x6"x 2 1/2" thick block of steel & 2 pieces of 2 1/2" x 5/8" flat bar.
2 - 1/2" x 6 1/2" Bolts for the "A" Frame
2 - 1/2" x 4 1/2" Bolts for the Fulcrum
http://img.photobucket.com/albums/v493/ ... pinion.jpg
http://img.photobucket.com/albums/v493/ ... era003.jpg
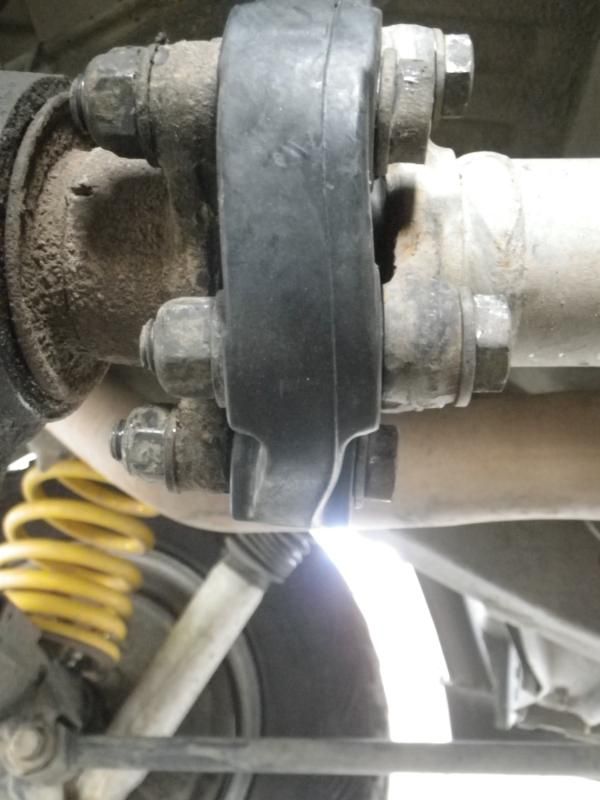
New adjustable Ball Joint.
As the Ball Joint becomes loose, you simply knock out the side indents, turn the tapper inside cup & punch in the indents.
http://img.photobucket.com/albums/v493/ ... aframe.jpg
Fulcrum with new Ball Joint
http://img.photobucket.com/albums/v493/ ... era002.jpg
I bolted the Block to the "A" Frame Arms & the Side Plates to the Fulcrum.
I then adjusted the Fulcrum Ball Joint angle & tacked the Block to the Side Plates .
(Leave enough room from the top of the Side Plates to the "A" Frame Arms for a min 3/8" weld.)
I then removed the bolts from the "A" Frame Arms & removed the Fulcrum Ball Joint from the Rear Diff., leaving the Fulcrum bolted the the Side Plates.
I first welded the ends of the Side Plates to the Block & then layed a 1/4" weld along the top of the Side Plates.
Remove the bolts & the Fulcrum will fall out.
I then stood the end of the Fulcrum 90` to give room to weld the inside of the Side Plates.
I did a 1/4" stitch weld on the inside of the bars.
This of course sucked the Side Bars in so tight that the Fulcrum would not come out.
I then layed another pass on the top of the Side Plates to give it a 1/2" bead which inturn pulled the Side Plates out enough to easily remove the Fulcrum.
Coat all bolts with Anti-Seize, bolt everything together & "Done Like Dinner!"
http://img.photobucket.com/albums/v493/ ... era004.jpg
http://img.photobucket.com/albums/v493/ ... era005.jpg
Pinion Angle Corrected
-
jeepingpw
- Worm Gear
- Posts: 189
- Joined: Wed Aug 05, 2009 7:27 pm
- Location: Vernon, B.C.
Pinion Angle Corrected
Last edited by jeepingpw on Sat Dec 01, 2012 8:40 am, edited 1 time in total.
-
franko
- Out of Africa
- Posts: 421
- Joined: Wed Jan 20, 2010 9:15 am
- Location: Victoria BC
Re: Pinion Angle Corrected
Really a 2in lift killed your rotoflex seems odd. I have not had any issues with OME heavy duty lift springs. And second why keep the rotoflex anyway,get the kit and a range rover drive shaft and get it done.
-
jeepingpw
- Worm Gear
- Posts: 189
- Joined: Wed Aug 05, 2009 7:27 pm
- Location: Vernon, B.C.
Re: Pinion Angle Corrected
It was a combination of the lift & a worn ball joint.
I put in 50mm HD springs that gave me 2 1/2" lift over what it was.
I have the kit & drive shaft, but have decided to stay with the Roto Flex for a few reasons .
1. It'll fail easier than a u-joint without the carnage. Most times when a u-joint has let go on me, it takes the drive shaft or pinion ears with it.
2. Roto flex takes up some of the load shock of wheel spin & therefore less transmitted to the rear axle shafts.
3. I can change a Roto Flex in the field in about 10mins with only 2 wrenches.