Page 1 of 1
Workin on the series III
Posted: Thu Mar 17, 2011 7:47 pm
by tbirdscott
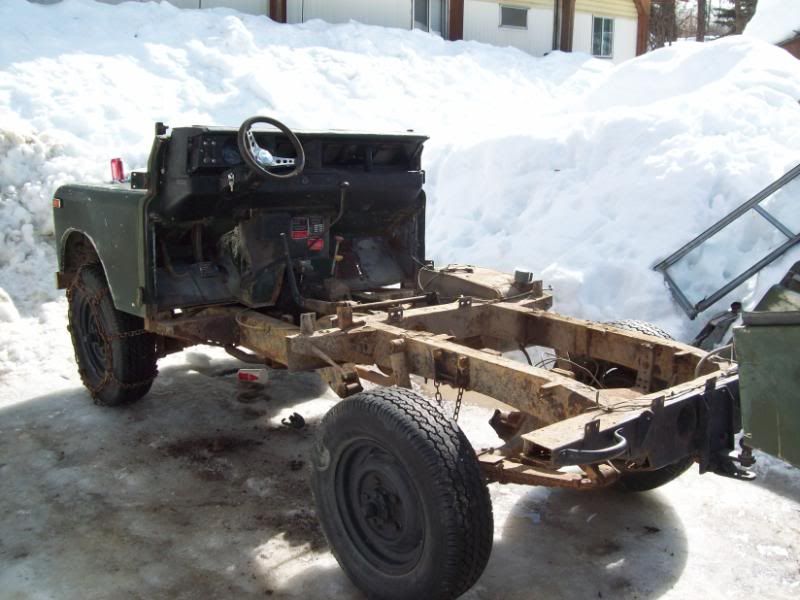
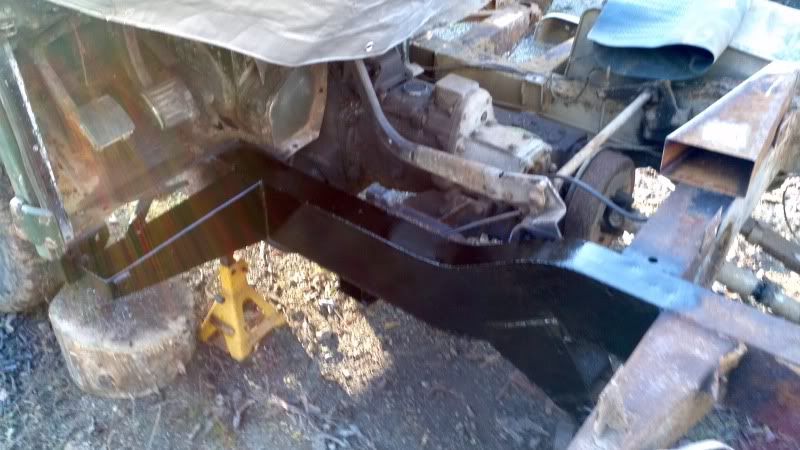
Well I had some time to kill today and it was nice out +6 so I decided no time better to tear in to the rover. Needs the rear cross member replaced along with the front body mounts and front 3" of the frame but otherwise it's in salvageable shape, better than I thought it was.
http://i68.photobucket.com/albums/i11/t ... 0_1114.jpg
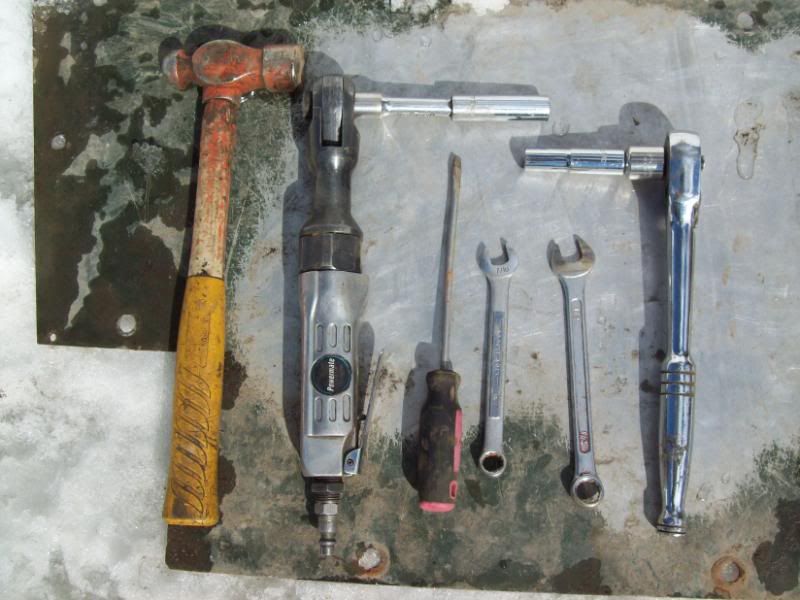
Had to empty the tool box to take this thing apart! lol
http://i68.photobucket.com/albums/i11/t ... 0_1113.jpg
Got the rear diff pulled before dinner too, sitting on blocks now. The PO tried to do a spring over swap but the driveshaft didnt fit and he gave up. Gonna try and get the diff back in the proper spot tomorrow and hack off the rear cross member. Anyone know how floppy the frame will be once cut out?
Scott
Posted: Thu Mar 17, 2011 8:55 pm
by mepham55
Looks fun!
I cut the rear cross member off my truck before starting a full rebuild. The frame stays pretty rigid certainly not floppy. Just measure between the rear side rails and make sure that measurement is the same when you weld on your new rear X. I cut a 2x4 to fit between the side rails and squeezed it in place with a ratchet strap at first, eventually I just let it fall out and my frame turned out fine. You will most likely have to cut some rot out on the bottom side of the frame rails near the rear spring hangers as well as where the bump stops are located. While your cutting things up, mine as well get all the rot out. Have fun!
Matt
Victoria BC
Posted: Fri Mar 18, 2011 11:14 am
by tbirdscott
Good to know it wont fold like a house of cards lol I think I will chop off the rear spring hanger and run some flat bar from the bump stop right to the back just to be safe, it has a couple so-so spots.
Does the rear axle mount just like the front axle with regards to the u-bolts and spring plate? the guy had square bolts cut to mount over the axle, welded on some steel scraps, and the spring plates are cracked so I will have to re-do all of that mess :roll:
Scott
Posted: Fri Mar 18, 2011 2:39 pm
by tbirdscott
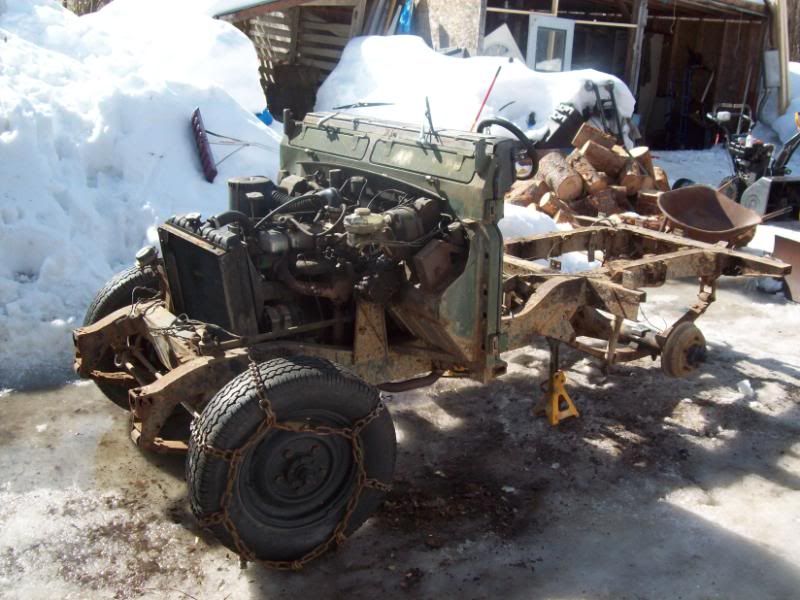
Got the junk cut off of the rear axle and cleaned up then tossed it on top of the leafs where it belongs then popped off the front end. WTF is with the one grill screw going in to a steel nut instead of the plastic ones like the other 3?
http://i68.photobucket.com/albums/i11/t ... 0_1120.jpg
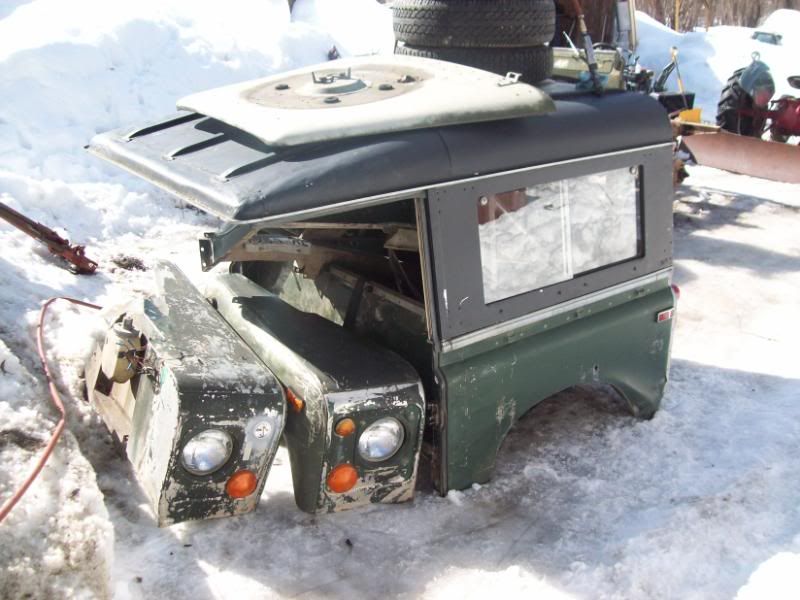
A rover can even store itself once taken apart! lol
http://i68.photobucket.com/albums/i11/t ... 0_1121.jpg
Everything I have taken off plus my tools are in there with room to spare, versatile!
Scott
Posted: Fri Mar 18, 2011 11:47 pm
by Dave_F
Good on you! Taking apart a Series outside in the Snow :shock: They must grow them tough up in Willow River. :lol:
Great Job and keep the pictures coming.
Posted: Sun Mar 20, 2011 7:25 am
by exmod90
Hey Scott ... looking good . PM me your ph# . Thanks . Gerry in Prince George .
Posted: Sun Mar 20, 2011 10:03 am
by DaveB
Looks like fun! And it looks like you're competing with Gerry for who has the most snow still.
I moved your post to the Projects and Builds topic as its likely a bunch of us will be following your progress as you get it rebuilt.
cheers, Dave
Posted: Mon Mar 21, 2011 9:35 am
by tbirdscott
Thanks Dave, dont know why I didn't put it here in the first place.
No more snow! Just gross amounts of it this year. Spent the last couple days out prowling around on the snowmobile so not much done on the rover. The snow melted down a couple feet and is almost as solid as pavement, great for exploring.
Gotta pick up some steel and welding wire tomorrow when I'm in town and get crackin.
Will keep everyone updated
Scott
Posted: Wed Feb 08, 2012 12:17 am
by tbirdscott
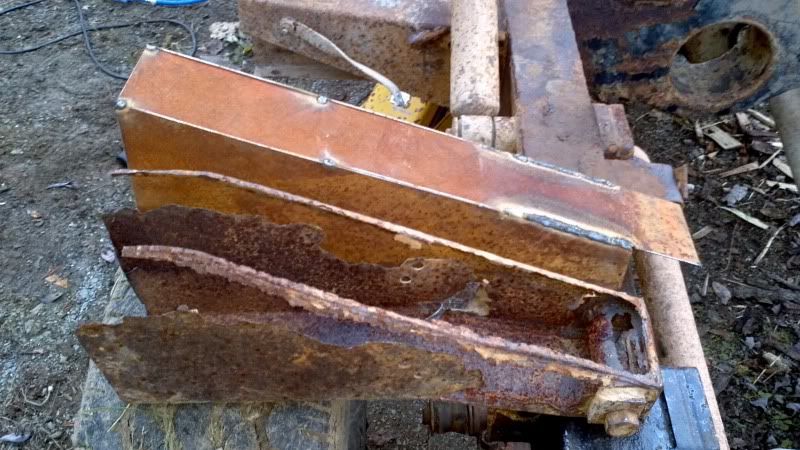
Wow it been a while since an update! Havent accomplished a heck of a lot, too many other projects and toys to distract me. Did get both sides of the rear frame boxed in from about the axle back and got the spring hangers and all the tabs back in place, Some viruses had a party on my HD and I lost all the pictures of that unfortunately.
I also made and installed front outriggers and got some of the surface rust taken care of.
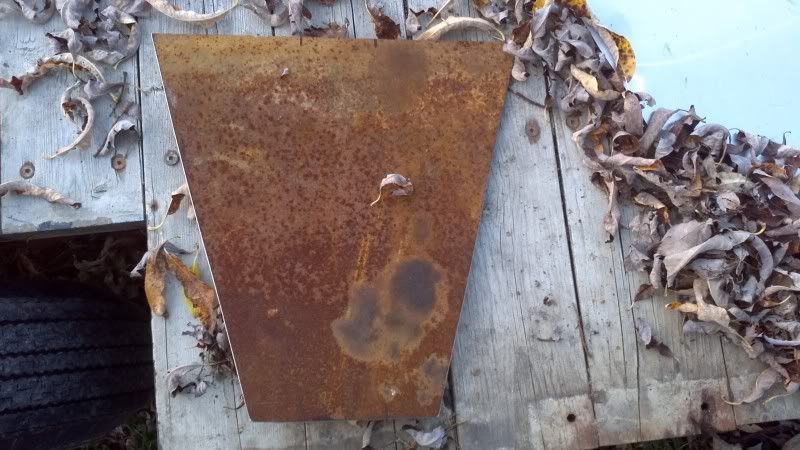
Cut a couple of these out.
http://i68.photobucket.com/albums/i11/t ... 47_629.jpg
After folding it around a piece of angle iron using violence and loud grunting, Not exact but close enough for this guy.
http://i68.photobucket.com/albums/i11/t ... 29_940.jpg
Found another ventilation hole!
http://i68.photobucket.com/albums/i11/t ... -45_66.jpg
http://i68.photobucket.com/albums/i11/t ... 13_147.jpghttp://i68.photobucket.com/albums/i11/t ... _392-1.jpg
Little bit of primer.
http://i68.photobucket.com/albums/i11/t ... 52_681.jpg
And some shiny marine enamel to keep it pretty.
http://i68.photobucket.com/albums/i11/t ... 56_802.jpg
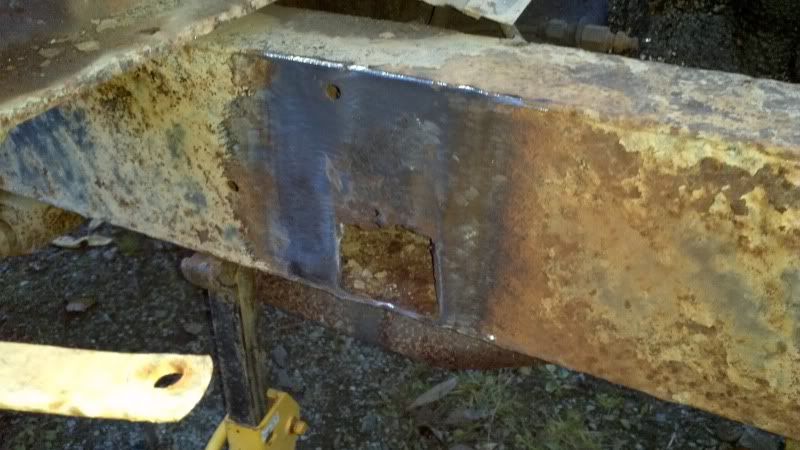
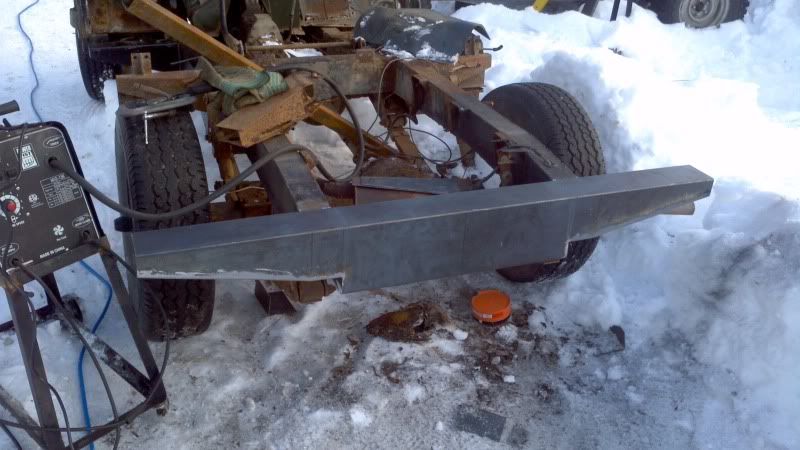
Started cutting out a new rear cross member today when my grinder lost it's magic smoke so I had to run to town and buy a new one. Will get that finished up and tacked on tomorrow I hope. Unless I get distracted :roll:
BTW
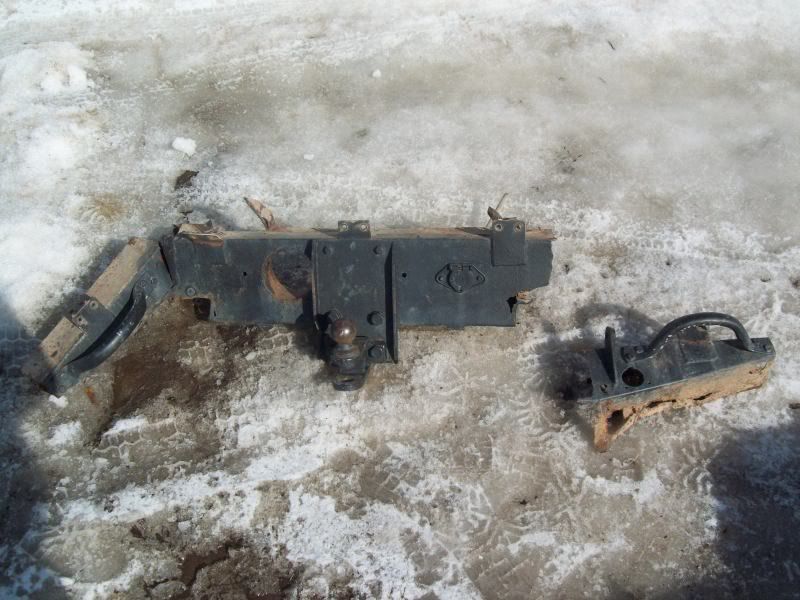
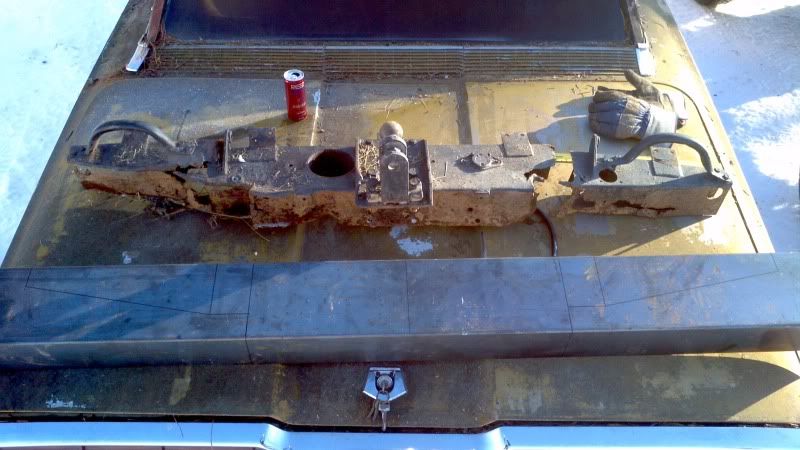
could someone please get me a measurement? I need the width of the rear cross member side to side across the top. and width in between the tail gate brackets. I think I got it close but there isnt a heck of a lot left of my old one to go by so my current measurements are a little vague...
http://i68.photobucket.com/albums/i11/t ... 0_1188.jpg
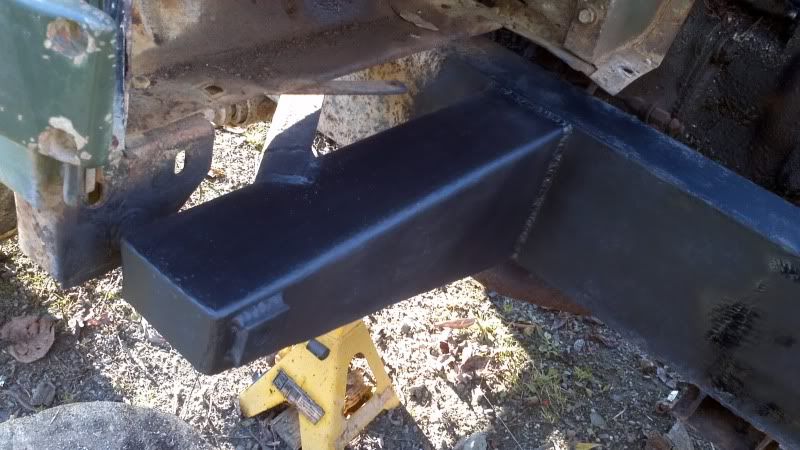
I am also thinking about ditching the drop bracket and trailer ball mount in favour of a 2" receiver hitch incorporated in to the rear cross member, I stepped up to 10ga for that reason. Maybe though I should I keep it original looking, thoughts?
Thanks
Scott
Posted: Wed Feb 08, 2012 4:23 pm
by tbirdscott
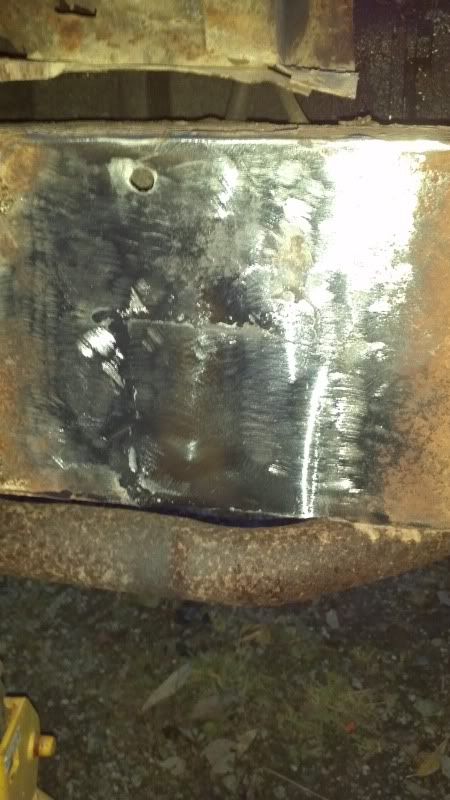
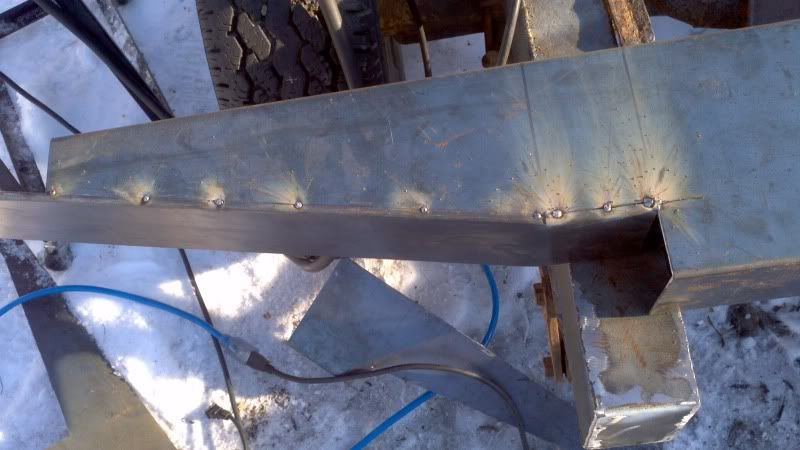
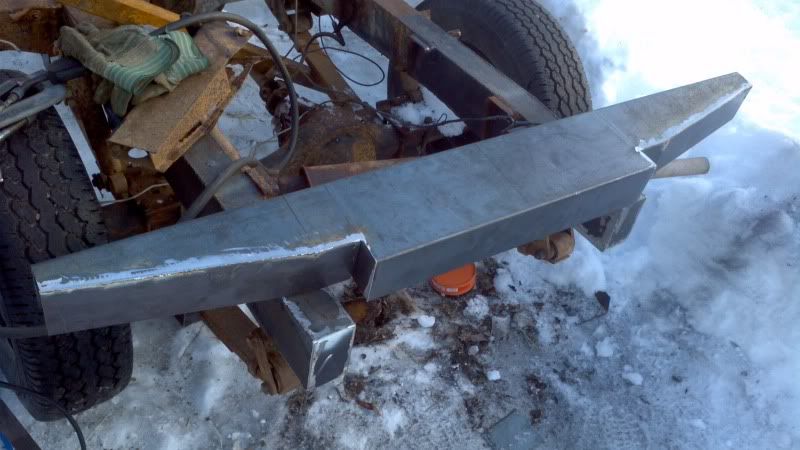
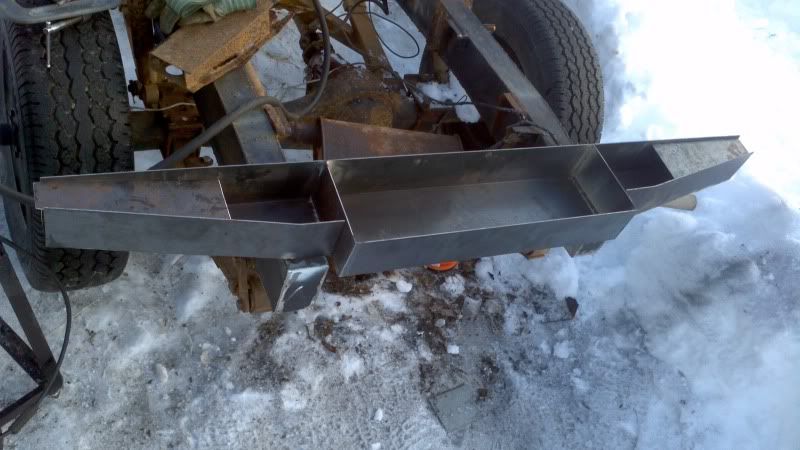
Well I got it looking like it should this afternoon, went pretty smoothly.
Got it drawn out.
http://i68.photobucket.com/albums/i11/t ... 1-20_7.jpg
http://i68.photobucket.com/albums/i11/t ... 24_780.jpg
http://i68.photobucket.com/albums/i11/t ... 02_983.jpg
The filler pieces on the sides will get welded in once it is attached to the frame so I can get in there with the welder.
http://i68.photobucket.com/albums/i11/t ... 09_377.jpg
Last test fit, sun is gettin low, air is gettin cold so enough for today.
http://i68.photobucket.com/albums/i11/t ... -57_49.jpg
Tomorrow I'll get the handles and tabs cut off the old cross member and cleaned up and start finishing it off. Gotta get a piece to fill it in between the frame rails and borrow buddies plasma cutter to pop out the hole for the PTO.
Scott